Here is a list of all of my NUMBER 1 product and service finds. From brownies and kitchen supplies to starting a food blog blogging recommendations and must-have apps for Instagram content. These are all things I have purchased and would recommend to all my friends.
This page may contain affiliate links. This means I receive a small percentage commission from any purchases you make through the link. This doesn’t cost you anything or change your customer experience.
My Fav Kitchen Supplies:
1. Good Knives
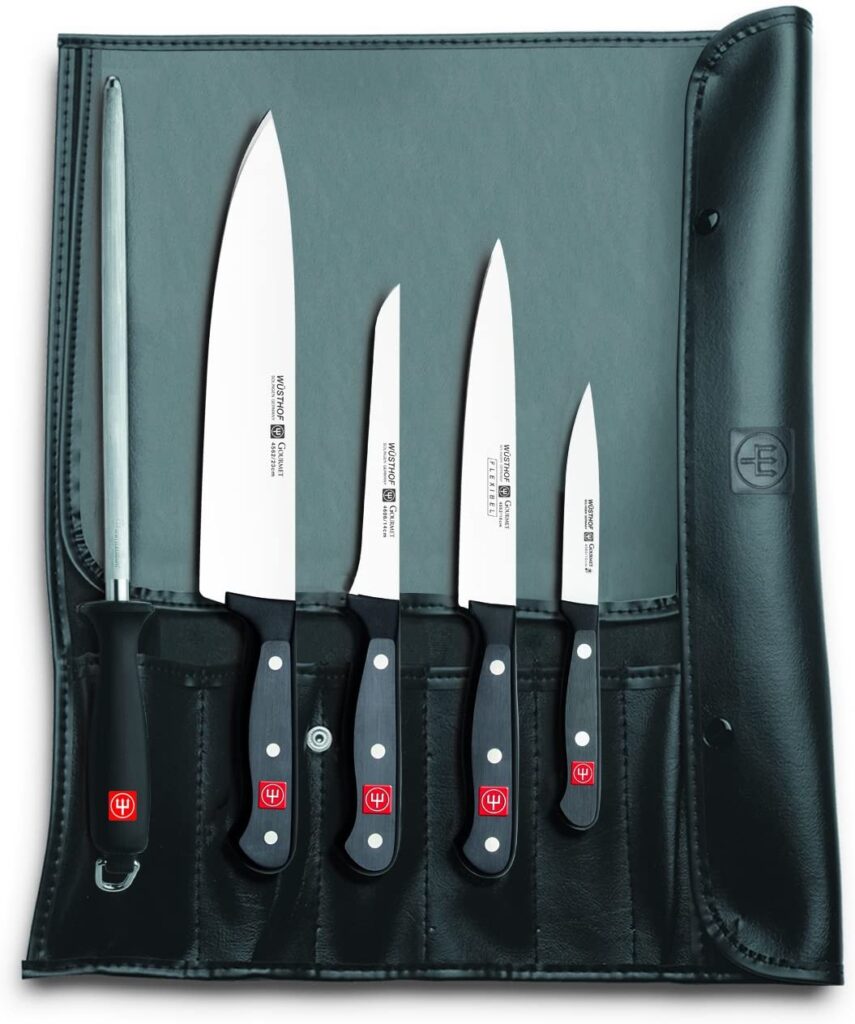
Good knives are a must for ease of cooking! I got mine from Marks & Spencer but you can only purchase them in-store.
Investing in some good quality knives and a safe to use knife sharpener will speed up your prep times and make cooking more enjoyable. Obvious, just be extra careful if you are using sharp tools but they will improve your cooking experience.
Check out Gaz Oakly’s YouTube video on How To Cut Like A Chef for more detail on how to cut safely. Here are links to the knives Gaz recommends in that video and a set of 5, from the same brand:
- Chefs Knife – https://bit.ly/30WL8Yy
- Serrated ‘Pastry’ Knife – https://bit.ly/30T0nlB
- Sharpening steel – https://bit.ly/3hOEF9f
- Paring knife – https://bit.ly/3jNaDEr
- Set of 5 items – https://bit.ly/3jKmfYR
2. Nespresso Coffee Machine

I am a HUGE coffee lover and as an ex-barista, I am in love with my Nespresso coffee machine. I got mine with the milk frother which is a GAME CHANGER!
Don’t like coffee?
I’d recommend the milk frother to anyone who loves hot drinks. You can use this for matcha lattes and hot chocolate too!
Or for a more affordable option have a look for an electric handheld whisk. I have used these in the past, before I had my espresso machine, to make super foamy milk for coffee and hot chocolates.
You can also use these handheld milk frothers to make Dalgona Coffee – check out my blog post on Dalgona (AKA Cloud) Coffee here.
3. Reusable Baking Mats
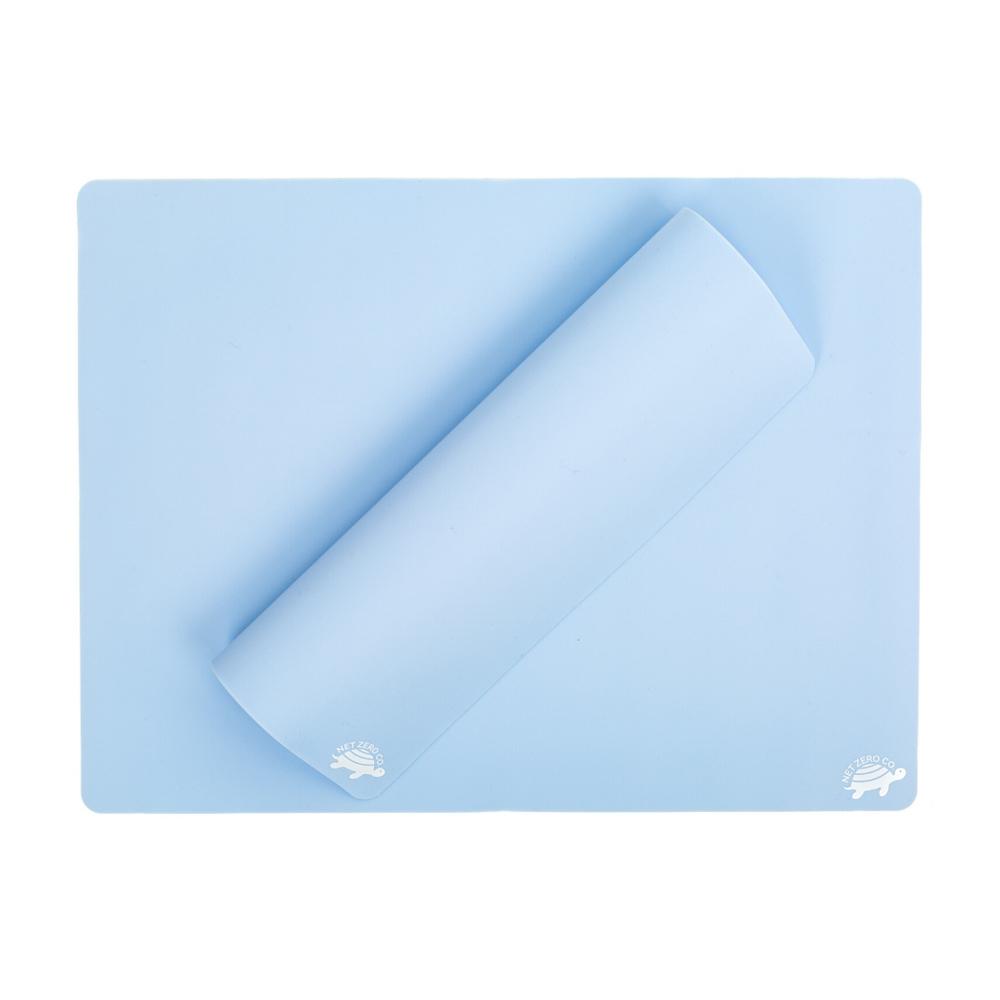
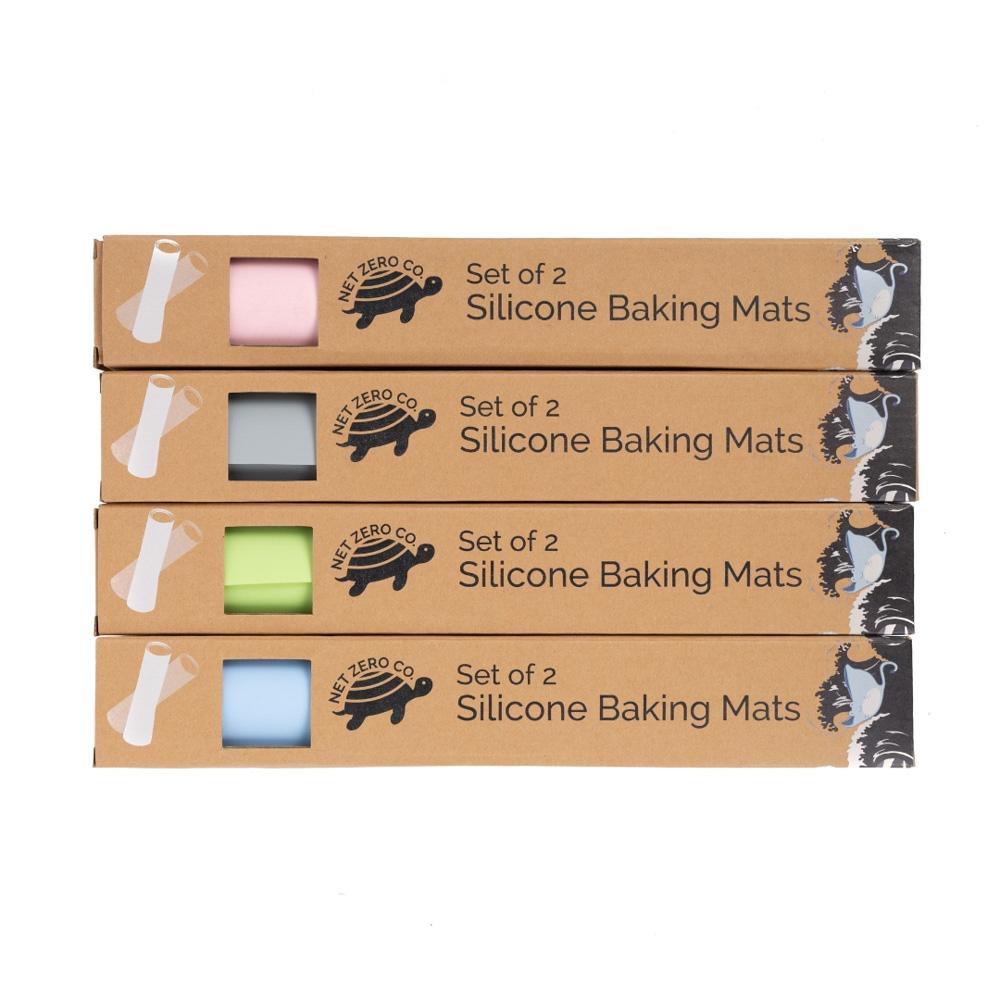
source: netzerocompany.com
I’ve been using silicone baking mats for years. They are great for baking sweet treats or savoury meals, such as brownies or sausages for a ‘bangers and mash’ meal.
I currently use these beautiful blue ones from Net Zero Co (*PR sample) and I love them any more.
P.S. If you are shopping from the UK, you can change the currency to GBP on the Net Zero website at the top right of the homepage.
4. Food Processor
I use a Phillips one for everything from homemade falafels to hummus to nice cream.
My Fav Vegan Food Finds:
Freshly Baked Goods
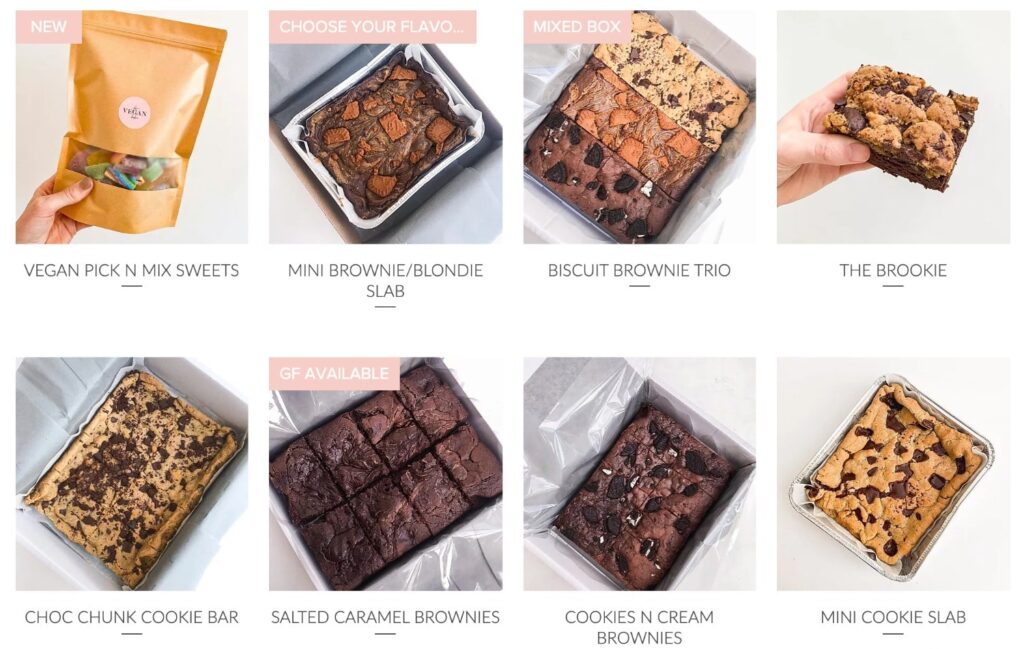
1. The Vegan Bakes
Not only are these the most DELICIOUS brownies I’ve ever had (not even the best vegan brownies, just hands down the best brownies ever!) but when you support TVB you are also supporting a female-owned, small business!
What should I order?
I recommend the Biscuit Brownie Trio. It is perfect for when you can’t decide what to try first and would make the perfect gift for anyone who loves chocolatey treats.
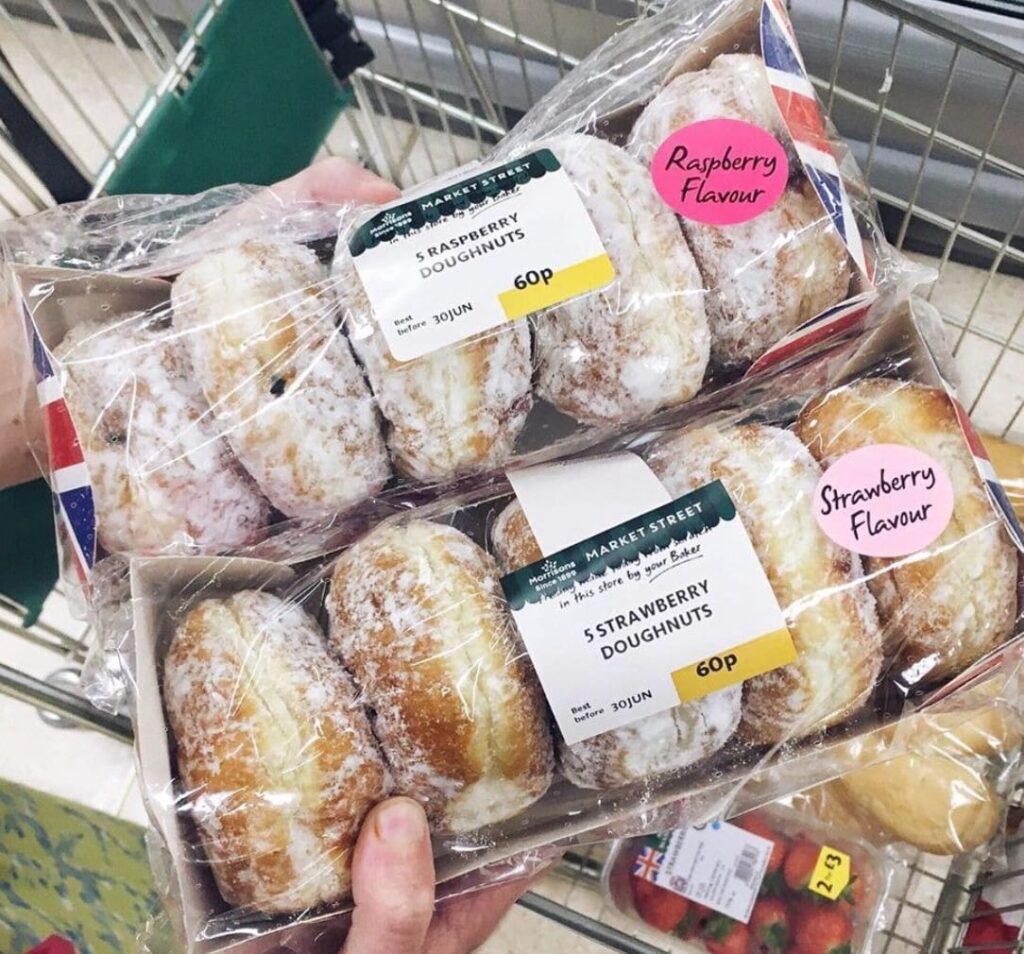
2. Morrisons Bakery Donuts
The strawberry and raspberry fresh doughnuts are accidentally vegan (Check the ingredients in your local Morrisons).
And at ONLY 50p for a pack of 5, you really can’t go wrong!
Shopping Online
3. The Vegan Kind Supermarket
The best online store you need to find all the vegan goodies!
TVK have a huge range of products, from cupboard staples to fridge items and they keep their stock up to date with lots of the new vegan product releases.
My Fav Food Photography Products:
All my TOP recommendations if you are starting a FOOD INSTAGRAM BLOG.
1. CLUB Backdrops
These CLUB backdrops have seriously upped my Instagram page 20x.
If you want a clean, consistent theme to your blog or Instagram then these are an absolute MUST HAVE!
I have accumulated 7 of these gorgeous backdrops. I opt for the white wood look, marble or natural wood backdrops as this works best with my theme but CLUB have a tonne of designs to suit your own theme whether that be light and neutral backgrounds to let you colourful, bright food stand out or if you prefer the dark and moody/mysterious vibe, they have you covered!
You can shop through my Aff link clubb.to/fromlibby for an extra 15% off your order. You can even use the 15% off link on top of the 3 for 2 bundle!
Yep, you can double dip on the discounts! (This works out at just over £11 per item – delivery free over £50, or £5 for one-day shipping under £50).
2. Fabrics
The majority of the fabrics you see in my photos are offcuts from my local fabric shop.
Do some research and see if any of the fabric or homeware shops near you have a bin of offcuts you can browse. This is not only the cheapest way to find fabrics to add texture to your photos but prevents the leftover fabric ends going to waste!
I’ve accumulated a few tea towels from various homeware shops so keep an eye out next time you go. I’ve even got some in my local supermarket home section, while I’ve been on my food shops!
3. Crockery and Props
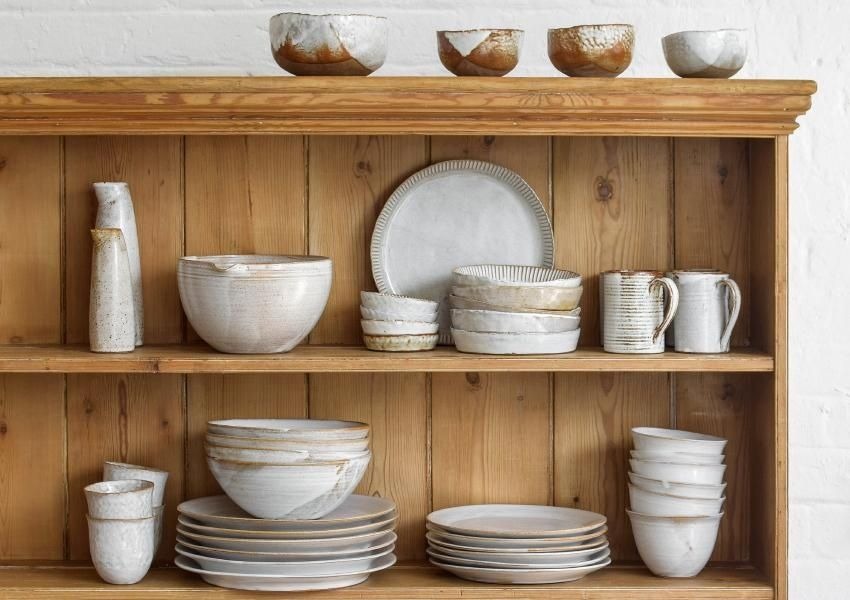
Here’s a list of some of my fav places to hunt for the best food photography props:
- Charity shops – Check the home section of your local charity shop (thrift shop). You can save money on kitchenware by buying second hand and it is better for the environment.
- Nom Living – The most beautiful crockery, pinch bowls etc. A few of my FAV food photographers and bloggers use Nom Living products. Check out www.myveganminimalist.com for examples!
- Supermarket Home Sections – Another affordable place to find crockery, tea towels, wire racks and more. I particularly love Sainsbury’s Home range.
- Finally, never underestimate the power of some cleaned jam jars, fresh herbs, baking parchment and other props you probably already have lying around at home!
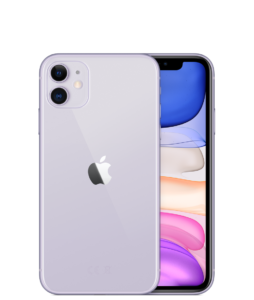
4. iPhone 11 – What I take all my pics with, inc for PAID ADVERTS!
A question I get asked all the time is what camera do you use to take your food pictures. My answer has been the same since I first started my Instagram account 5 years ago…
I use my phone!
I currently use an iPhone 11, purple with 128GB capacity if you were wondering 🙂
In the beginning, I ran the page purely as a hobby. For the first year of running my page, I used an iPhone 4. Then I upgraded to an iPhone 5 which I used to get me to 5,000 followers on Instagram.
I sat at the 5K mark for about 3 years.
Then I decided to INVEST in my food blog and see it like a BUSINESS.
I made a mindset change to turn my hobby and passion into a small business and invested my savings into the newly released iPhone 11 (the iPhone 11 has 2 cameras, the iPhone 11 Pro has 3, in case you wondered).
I have never been the type to feel the need to buy the latest tech so it was a huge leap for me to invest ~£900 into a phone. But looking back I think it was the best decision I made!
The reason I chose the iPhone 11 was purely because of the camera quality.
Within 2 months of owning my new phone and taking better photographs for Instagram…
…I got an email from a well-known brand, asking to work with me on a PAID PROJECT!
I actually got this crazy exciting email while at work in my retail job. Thankfully, my manager at the time was super supportive and was buzzing with me when I read her the brand brief on the shop floor. I was beaming with excitement for the rest of the shift for the prospect of landing my first freelancing job as a food blogger.
And what’s more!
The brand was interested in hiring me not only to do an Instagram advert with them (i.e to create content to publish on my account to advertise their product to my audience) but also looking PURCHASE MY PHOTOS to use on their own social media site!
That’s right! I was able to sell the content I had shot from just my iPhone.
I’m still a firm believer that you don’t need the latest technology to produce stunning results.
And, I know I learnt to improve my photography and editing skills by forcing myself to use (for lack of a better word) an ‘outdated’ camera phone, for the first 4 years of running my food blog. Using my iPhone 4/5 when the majority of the ‘competition’ was using much newer phone models or cameras pushed me to learn more and do the best with what I had.
When I felt like I had learnt everything I possibly could with the tool I had (my older model camera phone) I invested in the iPhone 11 and I’ve not looked back.
The proof is in the vegan pudding.
TOP TIP:
Shop the CERTIFIED REFURBISHED section on Apple.com to get second-hand models of phones. This can not only SAVES YOU MONEY but it is also more environmentally friendly!
I bought the iPhone 11 new, but since learning about the refurbished section I have bought my computer second hand.
BONUS RECOMMENDATION: I also have a Popsocket on my phone, as it makes it so much EASIER to take pics. It helps stabilise your hand when taking all sorts of angles, from flat lays to selfies.
5. Artificial Lighting

The best tip I can give you for when you’re trying to take good food photographs is to know your LIGHTING!
90% of the time I use natural light (but not direct sunlight).
Before you start to take pictures, find a space in your home by a large window, or take your food outside to a shady spot. Play around with shooting in different rooms of your house and using your outdoor space to find what works best for you.
I take the majority of my pictures outside.
However… there are times where having good artificial lighting is a godsend!
Have you ever made a beautiful looking meal only to look outside and see pitch dark? and quickly realise there is 0 chance of taking a good naturally lit photo, only to take some snaps in your yellowing kitchen light and being bitterly disappointed with the outcome!
I know I have.
These softbox lights are a small investment but they can make a huge difference in your picture quality.
I recommend you get 2 softbox lights. I use 2 to take a feed post or picture with myself included. You can get away with having one softbox light. I often only use the one from a more top-down angle photograph or for my short IG story video tutorials, but 2 would be ideal.
6. Light Diffuser

One of the first things I bought for my food Instagram photos was a light reflector/diffuser.
In hindsight, not the smartest first purchase.
I was itching to purchase something to improve my food photography and this seemed like a good idea at the time (because I wanted to feel more ‘pro’ and it wasn’t overly expensive).
If you are also wanting to start investing in equipment for improving your page, I would recommend investing in some quality backdrops and if your budget allows, use a good camera phone!
That’s not to say this isn’t a great photography tool!
However, with hindsight, I don’t think it is one of the key things to buy when you are first starting out.
The light diffuser is great its bright outside and you want to achieve a softer light. It’s also great when taking pictures of yourself when the light is a bit harsh. It softens your skin and creates even lighting and shadows.
You can also experiment with the reflector or black covers on the diffuser when you want to achieve different lighting setups.
To sum up,
Light diffusers are fab photography tools but not necessarily something I would recommend buying before my other recommendations. The reason I got one so soon into my Instagram journey was that it was a cheap way to feel like I was investing in ‘pro’ equipment.
If I had my time again I would invest the same £20 into a quality backdrop.
My Fav Blogging/Website Products:
So maybe you know the Instagram food blog game well. You have a good camera or phone, maybe even a backdrop or two. Now you want to move into owning your own website. Your own space on the internet to have more freedom over what you share, the ability to connect to a new audience AND the prospect of making some coin!
These Recommendations are for you if you are a newbie or an aspiring food blogger.
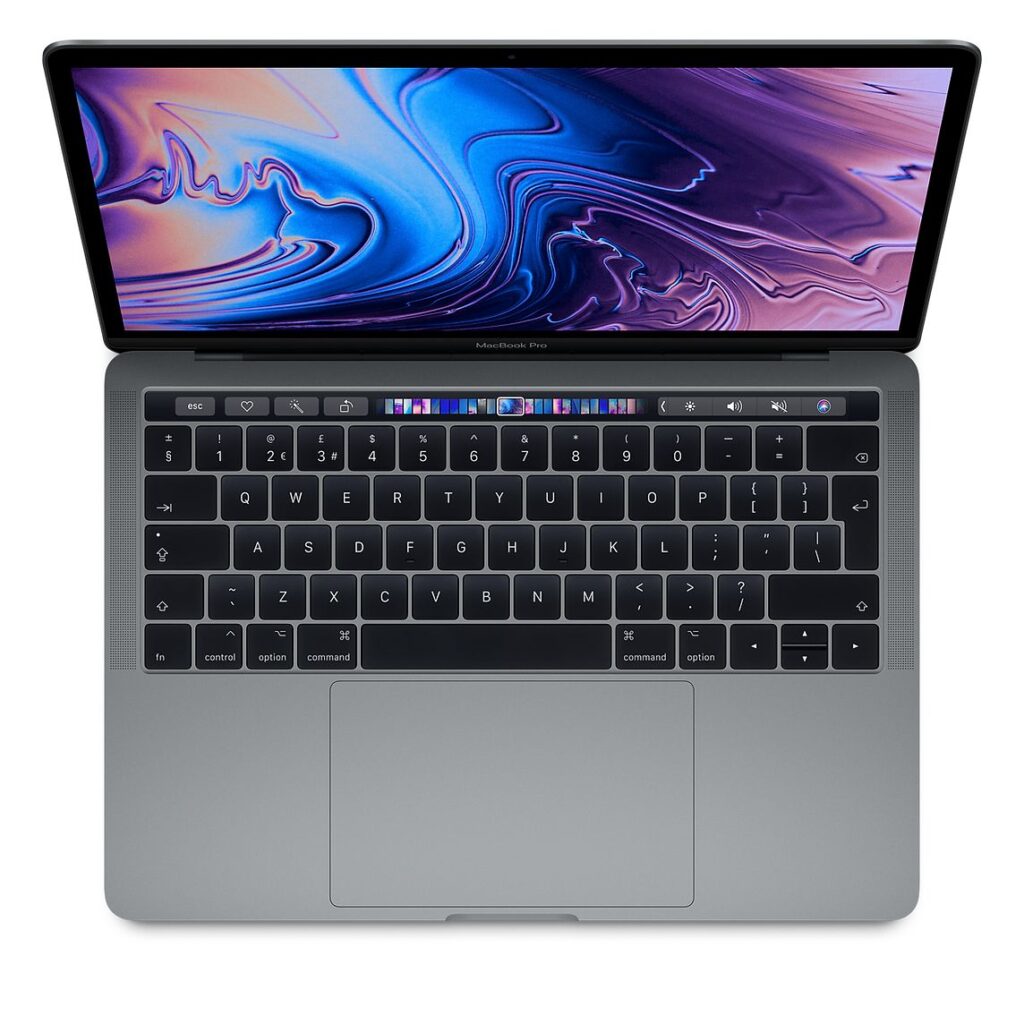
1. Refurbished 2nd Hand MacBook PRO
I spent weeks (actually probably more like a YEAR) researching for the best laptop for my needs:
- Photo editing
- Writing blog posts
- Taking online courses
- Writing essays for my studying
- …and watching copious amounts of YouTube videos.
Finally, I decided to invest in a MacBook Pro.
I knew I wanted to try and reduce my environmental footprint when making my purchase.
After a quick Google search, I came across Apple’s Certified Refurbished section! This enabled me to buy a laptop 2nd hand but with all the assurance that Apple had giving it a complete check before listing it for sale.
Buying a laptop second-hand,
Reduces environmental costs AND saves you money.
A WIN-WIN!
I saved £250 and my laptop was only 10 months old.
I would highly recommend Apple Refurb store if you are looking for a new desktop or laptop.
Or even an iPhone or Apple watch or iPad.
They have it all… second hand!
2. WordPress.org
Without a shadow of a doubt, I recommend going with a self-hosted website through WordPress.
I’ve hosted a blog on blogger and now I self-host this website (and my old website) through WordPress.org.
It took me a little longer to get used to the back end of using a self-hosted WordPress site.
But, I would NEVER go back to using a hosted webspace, such as Blogger, Wix or Squarespace.
You’ll get the hand of WordPress.org and there are heaps of helpful YouTube tutorials to help you get started online.
3. Bluehost
After trying out a couple of hosting services I now use and recommend Bluehost.
But what the heck is hosting?
Don’t worry, I had the same question!
Hosting is basically ‘renting’ your space on the internet, which allows people to actually see the content on your website address. And you can purchase hosting, aka internet rent, through many different ‘hosts’.
I now use Bluehost and here’s why!
Before I found Bluehost I was using HostGator. I hosted my old website with them for 4 years. The reasons I swapped:
1. PRICE!
Bluehost is cheap to start a site with. I have saved so much money by swapping to them.
Bluehost costs me less than £3 a month to host.
2. CUSTOMER SERVICE
Every time I have had a question or needed help Bluehost has been fab! Their chat feature makes it so painless to ask questions about your plan and they have always been super friendly to me.
The main reason I didn’t like Hostgator was their customer service. They took literally MONTHS to sort out a refund I was due because their system double charging me for my hosting subscription.
I would recommend Bluehost to anyone who is looking to start a blog now.
4. 17th Avenue Designs – Premium WordPress Theme
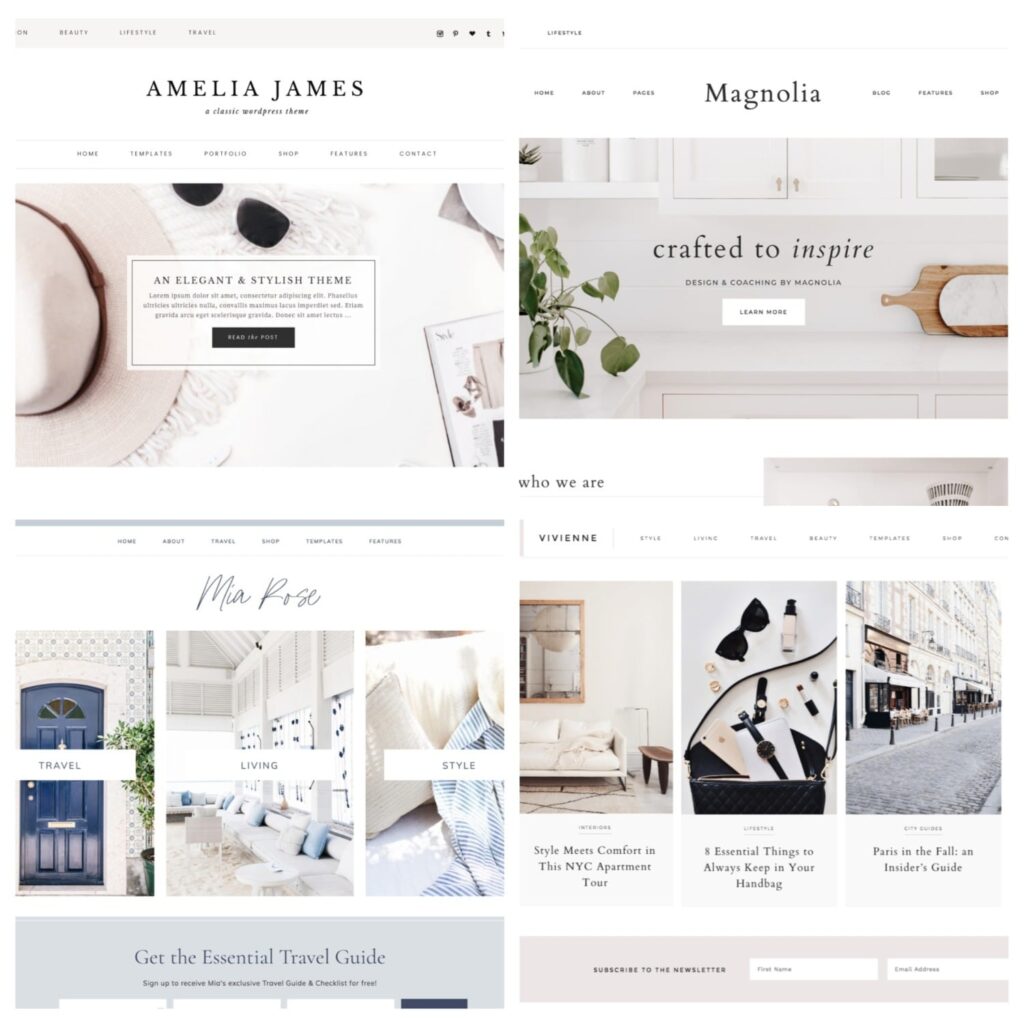
When I created my first blog, I used a free theme. I found it online through a YouTube tutorial and then spend days (literally) redesigning it to custom the template to suit my style.
It was a good way to learn about the features of WordPress and taught me a lot but when I decided to update my website (this website that you are on right now!) I knew I didn’t want to faff around trying to make it look PRO myself.
I found 17th Avenue Designs and I knew it would be worth the £50 investment to purchase a theme that was ready to go and looked super PRO!
If you want a simple, smart, classic yet feminine and beautiful theme then check out 17th Avenue.
I now use the AMELIA PREMIUM WORDPRESS THEME.
They have a tonne of designs to suit your needs and you can customise the colours, photos etc to personalise it to your brand.
You can also find themes for as little as £10 on websites such as ETSY.COM so have a browse there if you want to shop around a little.
I also love the themes by LucidDreams on Etsy. They have some really affordable and beautiful templates.
5. Fiverr

Use THIS LINK to get 20% off your first purchase!
Fiverr connects people and businesses with freelancers offering digital services in over 300 categories, from digital marketing to voiceover work to animation and more!
I use Fiverr to commission some of my pins for my Pinterest. firstly, because I’,m not a graphic designer and I don’t think I particularly have the eye for creating good pins. Secondly, because I wouldn’t have as much time to create more blog posts and Instagram content if I had to spend longer creating pins. I can get pins made for me to my specifications and then spend more time creating more content!
6. Free Stock Images
Where to find free stock images that you are legally allowed to use.
Do NOT just get images on Google as you might not allowed to use those!
Finding free stock images is super handy when you want to improve the aesthetic of your website or documents or create pins for Pinterest.
Where to find free stock images:
My Fav Food Blog Business Services:
1. Wave Accounting – Invoicing and Receipt Keeper

Wave allows you to file away your receipts and payments.
You can use the WAVE apps on your phone to directly add a picture of the receipt to the app, then the app will read the receipt and pull out the figures for you!
AND you can use the WAVE invoicing app to send invoices to brands once you complete on any work.
(I now use a custom invoicing template that I got as part of my enrolment in Patricia Bright’s Social Media Course – Info below – but I used Wave Invoicing for months when I was first starting out.)
I use Wave for both my Instagram business and my dog walking/house sitting services. It allows me to file away both of these expenses and incomes separately so there’s no confusion!
2. Canva
Canva is free and you can use their pre-designed templates for;
- Brand logos,
- YouTube banners,
- Instagram text posts,
- Instagram stories,
- Pinterest Graphics,
- Create a professional looking media kit.
Even if you are a tech-no-nothing, like myself, Canva has got you covered!
You can sign up to Canva Pro here for extra templates, frames, stock images or stick with the free version which is perfectly enough to get you going!
3. Patricia Bright Course in Social Media
I’v been a fan of Patricia for years and debated getting her course for months.
I then took a plunge to invest the £45 course fee into learning more about using social media as a BUSINESS and everything that goes along with that.
I can say now I’ve been enrolled that it was a great investment!
Find out more about the 9 modules in the course here; from finding a personal branding to incorporation to finance to knowing your worth. Patricia has you covered!
4. Grammarly
I literally can’t see why you wouldn’t add Grammarly to your Google Chrome extensions!
It’s been a lifesaver for checking my spelling and grammar in my blog posts and emails to brands.
Just simply a MUST HAVE.
My Fav Apps:
Want to start or improve your Instagram food blog? This list includes all the apps I use every time I create content for my Instagram @virtually_vegan.
These Recommendations are for you if you are interested in growing your Instagram page.
1. Photo Editing

I’ve played around with soooo many apps for editing pictures. I know everyone raves about VSCO but I‘ve just not been able to get a grip of it.
My two fav apps for editing pics are..
ADOBE LIGHTROOM.
I recently upgraded to premium Lightroom but you can absolutely get away with the free version!
I love how you can save your fav edits as a ‘preset’.
This saves SO much time when editing to help all your pics to all to have a similar vibe.
Lightroom is really user friendly and has been such a GAME CHANGER in improving my editing skills too.
SNAPSEED.
Another super easy to use an editing app. Would recommend using this if you have the free version of Lightroom and want use of some extra features, like a brush or healing tool.
2. Feed Planning

Ok so before I realised feed planning apps existed, I used to have a second private Instagram account where I would upload my content and see how they looked before posting on my main page.
And that was the biggest waste of time!
Now I use…
PREVIEW
Plan out your feed and schedule in posts.
It’s free (for one account) and connects to your Instagram.
This app makes it crazy easy to plan ahead and compare potential new content next to your existing posts.
3. Story Templates
If you want to upgrade your IG story game you need…
UNFOLD.
Unfold is what I use most often. You have to pay for the packages but I think they are 100% worth the £££ if you will use them often.
Other story planning apps I like are:
CANVA STORIES
STORYLUXE
FILMM.
4. Video Editing
The most user-friendly app I have used for editing videos is…
VIDEOLEAP (paid)
I used the free version for months and then decided to invest in the premium version of the app after waiting for a 50% off sale.
It was £17.49 for a year which for a cheapskate like myself is a big investment for an app but because of the user experience, I knew it was worth it!
I’m pretty impatient when it comes to trying out new apps. I don’t want to have to read a manual, I’m the type of ‘I’ll just wing it and experiment’ person and if I can’t work out the buttons or features quickly I’ll move on.
VideoLeap has been the simplest phone video editing software I have tried so far.
Another app I love is…
INSHOT (free)
I use Inshot to transform portrait videos into a square size for my feed posts.
InShot adds a border based on the video in use, so you can easily resize the videos, by adding a border without losing the aesthetics.